- Hyland Connect
- Content Management
- Alfresco
- Alfresco Blog
- Developing a simple JavaScript client using the Al...
- Subscribe to RSS Feed
- Mark as New
- Mark as Read
- Bookmark
- Subscribe
- Printer Friendly Page
- Report Inappropriate Content
This content is part of the tutorial describing how to develop a very simple JavaScript client using the Alfresco 5.2 REST APIs. In this document is introduced a very basic JavaScript client, used to list nodes in the Alfresco content repository. To better describe the tasks, we are going to use “a step by step“ approach, more practical and easy to follow for our goal.
Introduction of the simple client
 Which is the simplest client for Alfresco? The answer changes depending on the framework, technology, and complexity. In this exercise we are going to share an example of a possible client over Alfresco 5.2 REST APIs, assuming some involved technologies like Google Material Design and Ajax. You probably know that Google Material Design is the technology founding the Application Developer Framework and for this reason has been chosen as stylesheet for this lab.
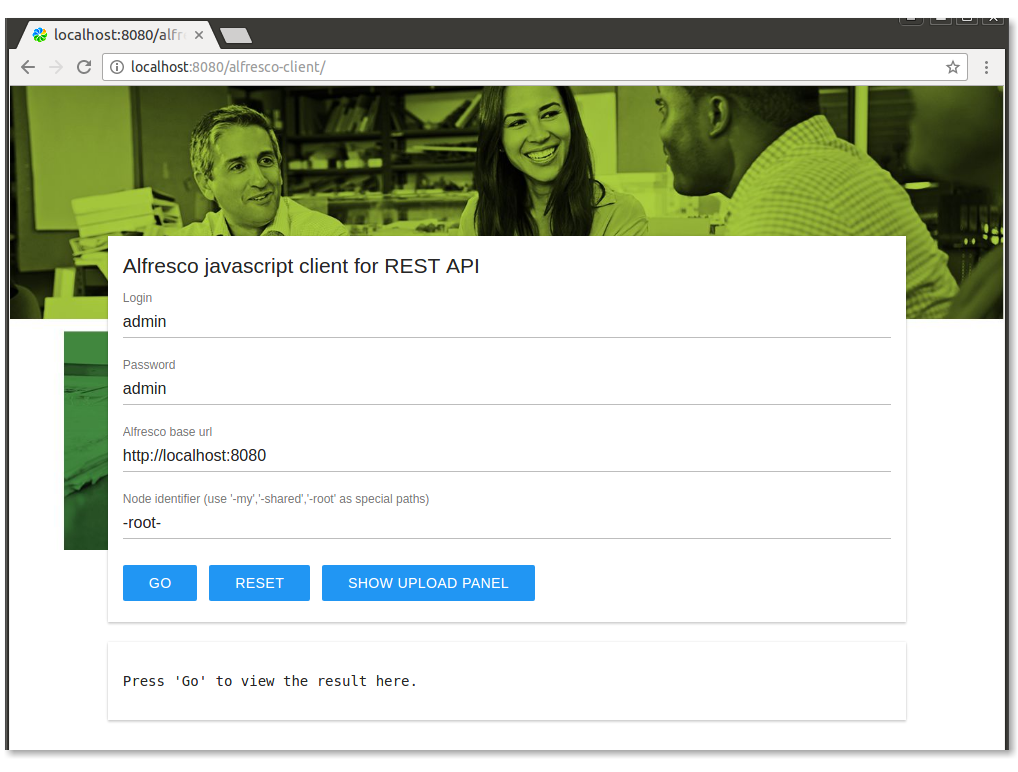
The final goal of this exercise is to list all the children of a node (assuming that the Alfresco node is a folder) to dive into the content of the Alfresco repository. The goal is to develop a very simple "repository explorer", with the intent to see in practice how this can be developed easily using the new Alfresco 5.2 REST APIs. Below a brief screenshot of how the simple client looks like.

How to download and install the client
Now that we know the final goal, let's see how to make it work in our development environment. If you haven't been through the previous parts of the tutorial, we strongly recommend to do it before continuing. If you already have your development environment up an running, you can follow the tasks below to setup the client.
- Start downloading the client from here.
- The installation package is a ZIP file that you can extract directly into your Alfresco installation at the path described below.
<alfresco>/tomcat/webapps
Please double check that the final structure of the folders is <alfresco>/tomcat/webapps/alfresco-client.
After this task, the JavaScript client is correctly installed.
- Restart Alfresco to be sure it will be available.
Description of the solution for listing nodes
Once Alfresco is up and running, open a browser and access to the URL below.
http://<alfresco_url>:<alfresco_port>/alfresco-client/
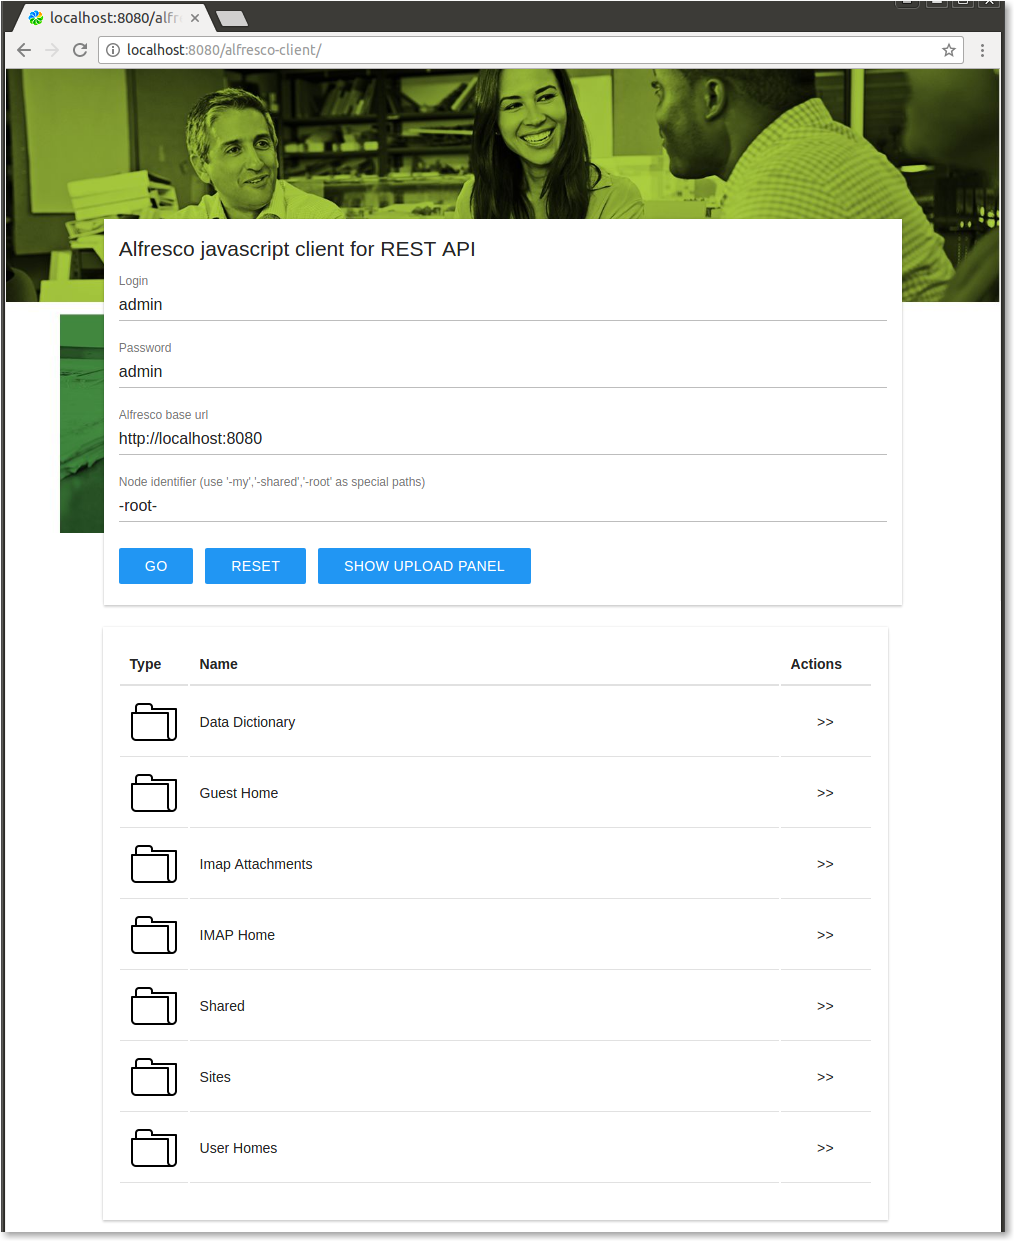
You should see the screenshot above into your browser. To use the client, fill in the requested fields with the correct values and click Go. Press the Reset button to clean the result panel. Below you can find a screenshot showing an example of result after pressing the Go button.

Taking a look at how the client works, all the magic happens in the index.html file. This file is a combination of three different technologies:
- The HTML used as container for the entire web page.
- The Google Material Design used as responsive CSS to render the various components of the page and manage the layout.
- The AJAX JavaScript to manage the interaction with Alfresco, using the Alfresco 5.2 REST APIs.
In this lab we won't go through the basics of the listed technologies, but if you need some further details on how they work, you can take a look at this external post. Starting from the index.html file (using Microsoft Visual Studio), let's focus on the AJAX calls related to the list of nodes. Below is quoted the JavaScript source code related to the Go button.
 // Go event.
 $('#go-button').click(function(e) {

   ...

   // Children retrieve.
   $.ajax({
     username: alfrescoLogin,
     password: alfrescoPassword,
     type: "get",
     data: "",
     url: alfrescoBaseUrl + "/alfresco/api/-default-/public/alfresco/versions/1/nodes/" + alfrescoNodeId + "/children",
     success: function(result,status,xhr) {

       // Parent retrieve.
       var alfrescoParentNodeId = "";
       $.ajax({
         username: alfrescoLogin,
         password: alfrescoPassword,
         type: "get",
         data: "",
         url: alfrescoBaseUrl + "/alfresco/api/-default-/public/alfresco/versions/1/nodes/" + alfrescoNodeId + "/parents",
         success: function(result2,status2,xhr2) {

           if (result2.list.pagination.count > 0) {
             alfrescoParentNodeId = result2.list.entries[0].entry.id;
           }

           ...

           $('#alfresco-result-table').html(getHtmlTable(result));

         },
         error: function(xhr2,status2,error2) {
           ...
         }
       });
     },
     error: function(xhr,status,error) {
       ...
     }
   });
  }
As you can see from the source code, there are two nested AJAX calls:
- the first to
/alfresco/api/-default-/public/alfresco/versions/1/nodes/<nodeId>/childrento retrieve the list of children of the node, - the second to
/alfresco/api/-default-/public/alfresco/versions/1/nodes/<nodeId>/parentsto retrieve its parents (an Alfresco mode could have multiple parents).
Each one of the services is going to answer with a JSON, describing the data in the source code collected into the result and result2 variables. You can view each JSON result in your environment using Postman on each described REST service.
Once that the JSON result is collected into the result variable, the getHtmlTable function does the rest building the HTML + CSS content to view the Explorer. You can go through the source code to see how the getHtmlTable function works, in particular how it manages the descriptions (icons and names) and buttons (navigation buttons and viewer).
You must be a registered user to add a comment. If you've already registered, sign in. Otherwise, register and sign in.
- Any alfresco 25.3 [dist zip] supported Javascript console installation amp link or resource? in Alfresco Forum
- Alfresco Community Edition 25.3 Release Notes in Alfresco Blog
- Safe, Fast, and Flexible: Running Untrusted Code for Alfresco with E2B and Docker in Alfresco Blog
- Highlights from the Alfresco Vegas Hack-a-thon 2025 in Alfresco Blog
- Implementing Alfresco pdf-toolkit to Alfresco community edition 7.4 in Alfresco Forum
